Tuesday, April 3, 2012

My passion for fruit

I'm crazy about passion fruit.  I find the sweet-tart flavor and intoxicating tropical perfume to be the most delicious and intriguing combination around.  When I was a pastry chef I often used passion fruit to make a rich curd, which I would put inside mini tart shells.  Even in small doses, passion fruit packs quite a punch.  I've been dreaming of a passion fruit meringue pie for quite a while now.  I finally decided to make it happen when my friend/co-worker left our store recently.  I made pie for her and wanted something totally different from the chocolate cashew butter mousse pie also on the roster.  The tartness of passion fruit makes it a great substitute for lemon in a meringue pie.  And of course with a fluffy, dreamy Italian meringue on top, how could I go wrong?  I think this is the perfect pie to usher in Spring time and would make a delicious addition to your Easter table.

Passion Fruit Meringue Pie
Makes one 9-inch pie
Adapted from Lemon-Passion Fruit Meringue Pie by Grace Parisi on the Food and Wine website

1 9-inch pie shell of your choice, I used graham cracker
2/3 cup passion fruit puree, I used Goya brand frozen pulp
1 cup sugar
3 eggs
1 cup water
1/3 cup cornstarch
pinch of salt
2 Tb. butter
1 recipe Italian meringue

Combine the passion fruit puree, eggs and salt in a bowl and whisk well to combine.  In a small, heavy pot combine the sugar and cornstarch and slowly whisk in the water to dissolve.  Cook over medium-high heat until thickened.  Whisk some of this hot mixture into the passion fruit mixture to temper the eggs.  Add this back to the pot and cook, whisking constantly, until the mixture has come to a boil and is very thick.  Add the butter and whisk until melted.  Pour the filling through a fine mesh sieve to remove any lumps of eggs and cornstarch.  Scrape the strained filling into the pie crust.  Press plastic wrap directly to the surface to keep a skin from forming.  Refrigerate until set and completely cooled, about 6 hours or overnight.

Pre-heat the oven to 450 degrees. Make the Italian meringue.  Remove the plastic wrap from the top of the pie and pile on the meringue, smoothing it out to the edge of the crust.  Make decorative swirls and peaks in the meringue.  Place in the hot oven and toast until it is browned to your liking.  This should only take a few minutes and don't walk away from the oven, as it will burn quickly.  Enjoy your delicious taste of paradise!

Topping the pie with meringue.


Pretty and spiky, ready for the oven!


Post-browning and ready to be devoured!

Oh look, there's my beautiful orchid again!

Monday, April 2, 2012

A Nutty Twist!

If you've been reading my blog you know that I gave up my "famous" Peanut Butter Pie recipe for my first blog post.  I was planning on making some pies for a good friend/co-worker who transferred to another store and was trying to come up with something delicious but not too time consuming.  Upon finding a chocolate pie crust and cashew butter in my cupboards, I had a crazy thought.  What if I turn my peanut butter pie into CASHEW BUTTER PIE?? Why the hell not?  All I did was substitute roasted cashew butter for the peanut butter in the original recipe and the results were fantastic!  Just be sure your cashew butter is room temperature when you mix up the filling.  The cashew flavor is a little more delicate than peanut butter, but the resulting pie was rich and creamy!  I decorated the top with a smooth layer of chocolate ganache and salted cashews, which provided a perfect compliment to the sweetness.  Who knew that just a slight change in the recipe would result in something so unique and delicious!


The salted cashews on top were perfection!


I had to get my orchid in the picture because I'm just so proud of it!

Friday, March 16, 2012

S'mores, please!

I've been seeing S'mores Pie around the internet for quite a while now and have had it on my "to do" list.  Twice I bought a bag of those Jet-Puffed Jumbo Marshmallows.  The first bag ended up being snack food.  Seriously, once you eat those giant, puffy, white wonders you'll never go back to the puny regular marshmallows again! The second bag remained unopened for several months until I finally got around to making this delightful pie.  Who doesn't love s'mores, the tasty, nostalgic treat?  Nobody, I say, NOBODY!  There is something about the crunchy graham cracker, sweet chocolate and toasty marshmallow that instantly transports me back to childhood.  I can almost smell the campfire smoke and hear the crackle.  Back to simpler times, when life was an adventure to be enjoyed, free of bills and responsibilities.  Oh, how I long for those days!  Sadly, those days are gone, but at least I can enjoy S'mores Pie!

S'mores Pie
1 9-inch graham cracker pie crust
12 Jumbo marshmallows (or however many mini or regular sized marshmallows you need)
2 cups half and half
1/2 cup sugar
2 eggs
2 Tbs. cornstarch
4 oz. high-quality dark chocolate, chopped
2 tsp. vanilla extract
2 Tb. unsalted butter
pinch of salt

To make the chocolate filling, heat 1 1/2 cups of the half and half, sugar and salt in a small, heavy pot until simmering.  Meanwhile, combine the remaining 1/2 cup half and half with the cornstarch and whisk to combine well.  Whisk in the eggs.  Add some of the hot half and half to the egg mixture to temper it, then whisk everything back into the pot.  Cook until the mixture comes to a boil, whisking constantly to avoid lumps.  Take the pudding off the heat and add the butter, vanilla and chocolate.  Let sit for a few minutes to melt the chocolate and then whisk well to combine everything.  Pour through a fine-mesh sieve directly into the pie crust.  Smooth the top then press plastic wrap directly onto the pudding to keep a skin from forming.  Refrigerate until completely cold and set, at least 6 hours.

Heat your oven to broil.  Arrange the marshmallows on the top of the pie.  Place the pie on the oven rack so it is about 3 to 4 inches away from the element.  DO NOT walk away!  I kept the oven door open and rotated the pie around constantly to brown the marshmallows evenly.  Do this until they are puffy and browned to your liking.  Enjoy immediately!

Get these.  NOW.

Line them all up on your pie.  If you like, you can cut some up to fill in the gaps.

Toast carefully under the broiler.

I'm eight years old all over again!

Sunday, February 12, 2012

Sweet and Salty!

Salted caramel is all the rage these days.  And it's no mystery why, salty and sweet is delicious!  So why not apply that principle to a pie?  Salted caramel apple pie.  Hell yes!  As I've said before, I'm really not apple pies biggest fan.  But when you cover it with a crunchy topping and slather it in salted caramel, sign me up!

I used the salted caramel recipe from Kelsey Nixon on the Cooking Channel.  It's easy to put together and makes more than you need for the pie, so put the rest in a container and save it for drizzling over ice cream, dipping fruit or cookies in, or eating with a spoon.  When it comes to apples, pick a variety that can stand up to baking, like Granny Smith, Fuji or my choice, Honeycrisp.  Sweet and juicy, the Honeycrisp apples at work were so fragrant I could practically smell them from across the entire store.  They were the perfect match for the salted caramel.

This pie turned out to be so delicious that I did not bring it to work like I usually do.  Once in a while I fall so hard for a pie (see Sweet Potato Meringue) that I can't bear to share it.  I must be greedy and keep it all to myself.  So if you make this pie with the intention of giving it away, be sure not to taste it because it won't be going anywhere except your belly!

Salted Caramel Sauce
1 cup sugar
1/4 cup water
3/4 cup heavy cream
3 1/2 Tb. unsalted butter
1 tsp. coarse sea salt or kosher salt

In a heavy saucepan, combine the sugar and water over medium-low heat until the sugar dissolves.  Increase the heat and bring to a boil, without stirring.  Use a wet pastry brush to wash down any sugar crystals on the side of the pan.  Boil until the syrup is a deep amber color, about 5 to 6 minutes.  Remove from the heat and carefully whisk in the cream.  The mixture will bubble up furiously.  Stir in the butter and salt.  Pour the caramel into a dish and allow to cool.

Crumble Topping
1 cup flour
3/4 cup brown sugar
3/4 cup sliced almonds
6 Tb. butter, melted
1/2 tsp. cinnamon

Combine the dry ingredients and stir to mix well.  Stir in the melted butter and mix to form crumbles.  Set aside while preparing the rest of the pie.

Salted Caramel Apple Pie
1 9-inch pie crust, unbaked
2 lbs. apples
juice of half a lemon
2 Tb. sugar
2 Tb. flour
Salted Caramel Sauce
Crumble Topping

Preheat the oven to 350 degrees and place a sheet pan on the middle rack.  Peel and core the apples and slice 1/4 inch thick.  Toss the apples with the lemon juice.  Combine the sugar and flour and toss with the apples.  Pour half of the caramel sauce over the apples and stir to coat.  Pile the apples into the pie crust and then cover the top with the crumble topping.  You will need to use your hands to press the topping onto the apples, forming a compact crust.  Place the pie onto the hot sheet pan.  Bake until the pie is well browned and  the juices are bubbling all the way through the pie, including the center.  This will take about an hour to 1 1/2 hours.  You may need to cover the pie with foil to keep it from browning too much.  When the pie is cooled, drizzle more of the caramel sauce over the top and if you like, sprinkle it with more coarse salt.

The apples tossed with salted caramel.

Crumble topping


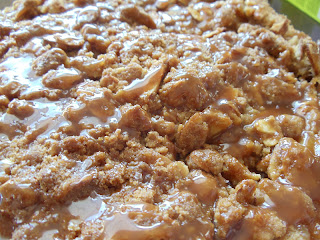
Oh la la, gooey caramel and crunchy topping!

Sweet and salty perfection!

Monday, January 23, 2012

Pretty in Pink Grapefruit

Next to clementines, my second favorite winter fruit treat is pink grapefruit.  Seeing as how I think of everything in terms of pie, naturally I decided to make a pink grapefruit pie.  Just like a lemon meringue, but with pink grapefruit instead.  And the topping has to be Italian meringue, of course.  I don't know why anyone bothers with "regular" meringue anymore when Italian is SO much better!

I really like the tart-sweet bitterness of pink grapefruit and didn't want to lose that quality in the pie.  So I didn't go too crazy with the sugar and I folded in chopped grapefruit sections to drive home the fresh taste of the fruit.  To do this you need to supreme the grapefruit, which involves cutting off all the skin and cutting out the segments, which produces beautiful slices of juicy fruit with none of the pesky white membrane attached.  You can get a quick lesson on how to supreme in this video by Elishia's Kitchen.

This pie is easy to put together and provides a fresh, beautiful addition to any winter meal!

1 9" graham cracker pie crust
2 cups freshly squeezed pink grapefruit juice
1/3 cup cornstarch
1/2 cup sugar
3 eggs, separated
pinch of salt
zest of one grapefruit
few drops red food color, optional
2 Tb. unsalted butter
1 grapefruit, supreme and chop

Italian Meringue
3 egg whites, saved from the yolks used in the filling
1 cup sugar
2 Tb. corn syrup
1/4 cup water
pinch of salt


For the filling, combine the grapefruit juice, cornstarch, sugar, salt and egg yolks in a small, heavy pot.  Stir well to dissolve the cornstarch.  Over medium heat, bring the mixture to a boil, whisking constantly to avoid lumps.  When the mixture is thickened, remove from the heat.  Stir in the zest, butter, grapefruit sections and food coloring, if using.  I used just a few drops to produce a dark pink color that resembled the fresh fruit when cut.  Pour the filling into the prepared crust and press plastic wrap directly to the surface to prevent a skin from forming.  Refrigerate until cold, about 4 to 6 hours.

For the  Italian meringue, combine the sugar, water and corn syrup in a small pot and stir to dissolve the sugar.  Clip a candy thermometer to the side and cook over high heat until the thermometer registers 240 degrees.  While the syrup is coming up to temperature, whip the egg whites in a stand mixer until soft peaks are formed and then whip in the salt.  When the syrup is done, pour it slowly down the side of the bowl into the whites while the mixer is running.  Avoid pouring into the whisk, as it will fling the hot syrup all over the bowl.  Continue whipping on high speed until the mixture has cooled and is fluffy, firm and glossy, about 4 to 5 minutes.

Pre-heat the oven to 450 degrees.  Pile the meringue onto the pie and make decorative swirls and peaks.  Toast in the hot oven until lightly browned, about 3 to 5 minutes.  Chill about 30 minutes before serving.

Beautiful inspiration!

Adding the meringue to the cooled pie.

So simple and beautiful

Oh, a slice for me!?  Aw, you shouldn't have!

The perfect Winter sweet treat.

Tuesday, January 17, 2012

Crazy for Coconut!

My birthday was in December and I fully intended to make myself my personal favorite, Coconut Cream Pie.  I even  bought all the ingredients but when the day rolled around, I realized I was too lazy and scrapped the plans.  Luckily, my dear friend Lindsay made me two delicious pies herself!  I tell ya, having someone else make pie for me was just about the best birthday gift I could get.  She made a fabulous peanut butter and jelly pie and, to my delight, a coconut cream pie.  Now that is friendship!

Fast forward to the New Year and I still have the ingredients in my cupboard.  Might as well make that pie now.  This one is full of the namesake ingredient - I use coconut milk and plenty of shredded coconut in the filling and shower the top with a thick layer of toasted coconut as well.  If you're like me and crazy for coconut, this one won't miss!

1 9" graham cracker pie crust
1 can coconut milk
1 cup heavy cream
1/2 cup sugar
3 eggs
6 Tb. cornstarch
2 tsp. vanilla extract
1 bag sweetened shredded coconut, divided usage
2 cups heavy cream
3 Tb. powdered sugar

For the filling, place the heavy cream, coconut milk and sugar in a small, heavy pot over medium high heat.  Bring the mixture to a boil.  While the milk is heating, whisk together the cornstarch and eggs.  When the milk has boiled, add a ladle full of it to the egg mixture and whisk well.  This will temper the eggs so they do not curdle when you add them into the hot milk.  Whisk the egg mixture back into the pot of milk and lower the heat to about medium.  Bring to a boil, whisking constantly to avoid forming lumps.  When the filling is thickened, remove from the heat and stir in half the bag of coconut and the vanilla extract.  Pour the filling into the crust and press plastic wrap directly to the surface to keep a skin from forming.  Put in the refrigerator and chill completely, about 4 to 6 hours.

Toast the rest of the coconut in the oven until golden brown.  You will need to stir it around frequently so it toasts evenly.  Watch it carefully to be sure it doesn't burn.  Let cool completely before putting on the pie.  Whip the heavy cream and powdered sugar together to stiff peaks.  Cover the top of the cooled pie with the whipped cream and toasted coconut.  Enjoy!

Just some simple ingredients.

Make a coconut custard for the filling.

Creamy and chocked fully of coconut!

Wednesday, January 4, 2012

Cutie Pie

You're probably wondering where I've been.  No place fantastic, unfortunately.  I've just been busy.  The holidays, work (during the holidays!!), moving to a new house... You know, life stuff.  I really did plan on delving deep into holiday pies for the blog, but I never made it past the Cranberry Meringue pie.  Oh well.

So I was staring at our box of Cuties (California clementines, my winter favorite) the other day and it hit me, Cutie Pie!!  Damn, I am so clever I practically can't stand myself.  In my mind cutie pie looked like a fluffy mousse-like cloud, decorated with cutie segments.  Oh yes, it will be mine.

I found some recipes for clementine pies on the internet to inspire me.  I ended up making a clementine curd (based on the fruit curd master recipe in The Pie and Pastry Bible, by Rose Levy Beranbaum.).  To the hot curd I stirred in gelatin and after the mixture cooled, I added heavy cream and whipped it up.  Perfection!  Sweet, a tiny bit tart, creamy and fluffy, my Cutie Pie is the picture of perfection!  Not a bad comeback, I'd say.

Cutie Pie
1 graham cracker crust, store-bought or your own
1 cup freshly squeezed clementine juice (I use Cutie brand)
Zest of 4 clementines
2 Tb. lemon juice
1 packet unflavored gelatin
heavy pinch of salt
4 egg yolks
1/2 cup sugar
4 Tb. butter

1 cup heavy cream
2 Tb. sugar
clementine or mandarin orange segments for garnish, blot dry on a paper towel

Stir the gelatin into the lemon juice and set aside to let bloom.  In a small, heavy pot combine the sugar and egg yolks, whisking well to combine.  Stir in the clementine juice, salt and butter.  Set the pot over medium heat and cook ,whisking constantly, until the mixture is thickened and coats the back of a spoon.  Be careful not to get it too hot, or your eggs will scramble.  Add in the gelatin and zest, stir until the gelatin is dissolved.  Scrape the mixture into a bowl and refrigerate until the curd is thickened and partially set.

Put the clementine curd into the bowl of a stand mixer.  Add one cup of heavy cream and whip on high speed until the mixture is smooth and fluffy, about 3 to 5 minutes (this may take more or less time depending on the how cold and set the curd is).  The mixture is still not fully set at this point, so don't worry if it seems a little soft.  Pour the mousse into the prepared pie crust and smooth the top.  Refrigerate until set, about 2 or 3 more hours.

Whip the heavy cream and sugar to stiff peaks.  Decorate the top of your Cutie Pie as desired with whipped cream and orange segments.  Enjoy the sweet, creamy goodness!


Start with some beautiful clementines.
 
Make a delicious clementine curd.

When it's thick and looks like this when you stir it up, whip it with heavy cream.

Pour into a pie shell and refrigerate until set.


Cutie Pie!
Sweet, creamy citrus.  So beautiful and delicious.