Showing posts with label Cook's Illustrated. Show all posts

Saturday, August 13, 2011

Cherry Custard Pie

Custard pie is very old-timey in my opinion.  I like that.  I also like that custard pie is rich and velvety and so deliciously decadent.  I happened to have a lot of cherries on hand and combining the two just seemed to make perfect sense to me.  I was very pleased with this pie.  The sweet cherries and rich custard were a match made in heaven.  Very much like creme brulee with cherries in a crust.  The top developed a thin, sugary, brown crust that really drove the pie home!

Cooking a custard pie can be tricky because the egg mixture requires gentle heat, but the crust needs high heat to cook through and brown.  I've read a lot about "slipped" custard  pies that require cooking the two items separately and then slipping the filling into the crust.  I wasn't ready to tackle that one just yet, so for this one I blind baked the crust first.  I went with my good ol' standard pie crust, Cook's Illustrated fool proof pie dough recipe.  The crisp, flaky crust is the perfect compliment to the creamy custard.  I used Grand Marnier in this pie, but you could substitute Kirsch or even rum.


Cherry Custard Pie
1 9" pie crust

2 whole eggs
3 egg yolks
3/4 cup sugar
pinch salt
1 tsp.  vanilla extract
1/2 tsp.  almond extract
2 Tb.Grand Marnier
1 1/2 cups heavy cream
3 cups pitted cherries

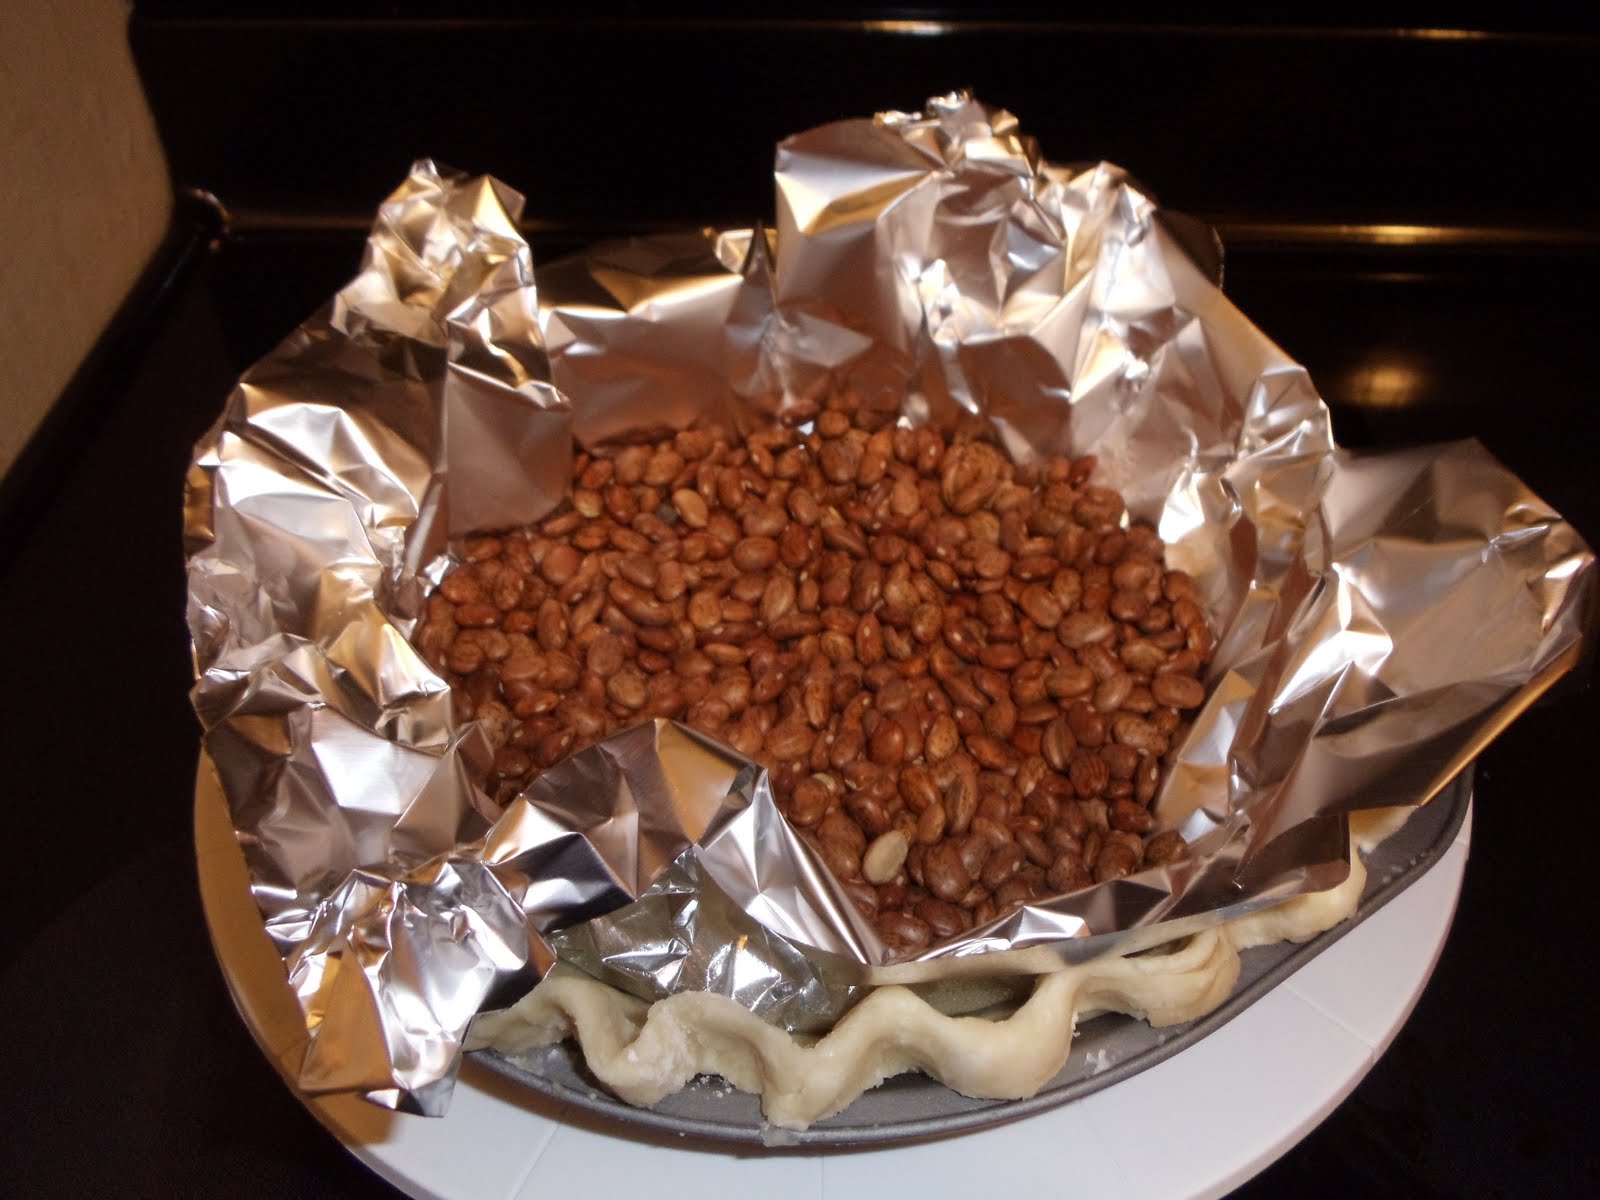
Place a sheet pan on the lowest rack of the oven and pre-heat to 400 degrees.  Roll out the pie crust and press into the pie pan.  Use a fork to prick holes in the crust all over.  Line the crust with a piece of foil and fill with dry beans or pie weights.  Place the crust on the hot sheet pan and bake for 20 minutes.  Remove the foil  and beans and allow to cool slightly.

Combine all the liquid ingredients to make the custard filling.  Put the cherries into the partially baked pie crust and pour over the custard.  Place the pie back on the pan in the oven and bake for 15 minutes.  Then turn  down the heat to 325 and cook until the custard is set but jiggles lightly when you gently shake the pan, 30 to 45 minutes.  Let the pie cool on the counter for about 20 minutes and then refrigerate until cold.

Mediocre picture of an outstanding pie!

Creamy goodness!!


Tuesday, July 19, 2011

Life is a Bowl of Cherries!

It just wouldn't be a pie blog without a classic cherry pie!  I've actually never made a cherry pie from scratch.  When I was a kid I made cherry pie using canned filling.  But this was my first attempt using fresh cherries.  And by the way, get yourself a cherry pitter of some sort!  I still don't have one and did this by cutting the cherries open and prying out the pits and it took WAY too long, not to mention my cuticles and nails were stained for two days!  I'll be purchasing one today as I still have about five pounds of cherries to pit.

We've discussed before about the benefits of experimenting in the kitchen because you always learn something.  This time I learned that I prefer a juicier cherry pie and should put less thickener in the filling.  This one sliced nice and clean, but a little extra sauciness surrounding the cherries would have been perfection.  As with mostly everything, you'll need to adjust this filling to your taste and fruit.  Add a little extra sugar if your cherries are pretty tart, or don't, if you like them that way.

A lattice top crust is typically the way that cherry pie is presented.  Making a lattice from scratch is a commitment, so I thought this would be the perfect time to use my pie topper stencil from King Arthur Flour.  I used the heart side, of course!  For this pie I used my good ol' vodka pie crust from Cook's Illustrated and I highly recommend you do as well!  But nobody will know if you use a pre-made crust or your own favorite recipe.

Classic Cherry Pie
Makes one 9-inch pie

1 recipe pie dough for a double-crust pie
4 cups pitted cherries
Sugar as needed, I used 1/2 a cup
2 Tb. lemon juice
1/4 cup orange juice
2 Tb. cornstarch (may need more or less depending on your fruit)
1 tsp. vanilla extract
1/4 tsp. almond extract

Place a sheet pan on the bottom rack of your oven and pre-heat the oven to 400 degrees.  Combine all the filling ingredients and set aside.

Roll out your bottom crust and place into the pie pan, being sure to press it in evenly.  Roll out your top crust.  You can cut it into strips for a lattice if you like, or use a stencil like I did.  Place the filling into the the pie pan and brush the edges of the pie dough with water.  Cover with the top crust and press the edges together, the water will help them stick.  Trim the edges of the crust so they are even with the pan.   Flute them if you want, or just use the tines of a fork to crimp them.  If you aren't using any kind of design on the top, cut a few steam vents.  Place the pie in the freezer for 15 minutes then remove.  If you want, you can brush the pie crust with cream and sprinkle with raw sugar for a nice brown, crunchy finish.  Place the pie on the hot pan in the oven and bake for 25 minutes.  This will help the bottom crust set.  Move the pie and the pan to the middle rack and lower the temperature to 350 degrees.  Cook for an additional 20 to 40 minutes, or until the crust is nicely browned and you can see the cherry filling bubbling.
My adorable heart stencil!
By rolling your crust onto your rolling pin, you can easily transfer it to the pie pan.
My beautiful cherry pie after a short nap in the freezer.  Brushed with cream and sprinkled with raw sugar.  Look at those beautiful flutes on the edge!  Too bad they don't stay so perfect after being in the oven.
The finished pie!  See what I mean about the fluting on the crust?  Oh well, I'll work on it.

Peek-a-boo hearts! I see you cherries!

Wednesday, July 13, 2011

Blueberry pie with the quickness!

Today let's keep it short and sweet!  This pie is easy to throw together, especially if you prep in advance and keep discs of pie crust in the freezer.  Or you can pick up your favorite crust at the grocery store.  The blueberries don't need to be cooked ahead of time, just tossed with a few ingredients and then topped with a crunchy, sweet crumble topping.  This would be lovely served warm with ice cream or whipped cream.


Blueberry Crumble Pie
1 9-inch pie pan

1 pie crust, unbaked
Filling
4 cups blueberries
zest and juice of one lemon
3/4 cup sugar (more or less depending on your taste and berries)
4 Tb. instant Clearjel (or 2 Tb. cornstarch)
pinch of salt
Topping
1 cup flour
1/2 cup rolled oats
1/2 cup brown sugar
1/4 tsp. cinnamon
1 stick butter, melted

Put a sheet pan on the lowest rack of the oven and pre-heat to 400 degrees.  Fit the crust into a pie pan and decorate the edge as desired.  Put into the freezer.

Add the lemon juice, zest, salt and half a cup of sugar to the blueberries.  Toss together and set aside.  Combine the remaining sugar and the instant Clearjel and set aside.

Combine the flour, oats, brown sugar and cinnamon in a small bowl.  Add the melted butter and mix well, until the mixture is crumbly.  Put into the refrigerator for 15 minutes.

Take the unbaked pie crust out of the freezer. Combine the sugar and Clearjel mixture with the berries and toss well to combine.  Put the berries into the pie crust.  Sprinkle the topping onto the top of the pie, breaking up with your fingers to make crumbles.  Place the pie onto the pre-heated sheet pan and bake for 30 minutes.   Then lower the oven temperature to 350 and move the pan to the center rack.  Bake for another 20 to 30 minutes, until the crust and topping is nicely browned and you can see blueberry juices bubbling through the cracks.

Saturday, June 25, 2011

Pie Confessions

I have a confession to make.  Actually, I have two confessions.  The first is that I've always struggled with making pie crust from scratch.  In fact, it wasn't until the last 6 to 8 years that I even really tried to work on my pie crust skills.  And even still, those damn Pillsbury pre-made pie crusts are just so convenient.  Just unroll the dough into your pie pan and have a nice day!  But for this pie I decided to go for it.  It's hot in my apartment today and pie crust doesn't like heat while it is being made.  Yeah, you get my drift.

My second confession is that the pie I made today is based on my fond childhood memories of eating sour cream blueberry pie at Marie Callender's.  I grew up in a very small town.  When Marie Callender's came to the "big city" an hour south of my home, my family went there for dinner and I tried the sour cream blueberry pie.  Wow, was my mind blown!  A sweet, juicy blueberry filling topped with  a creamy concoction of sour cream! What more could a chubby young girl possibly want with her fruit?  So that became my go-to pie whenever our parents agreed to take my sister and I to the culinary mecca that was Marie Callender's.

Times have changed and I cook for a living now, and it ain't at Marie Callender's!  My tastes my have grown up along with the rest of me, but I still think about that blueberry pie.  I've even thought about re-creating it in the past, but like many things on my eternal to-do list, I never got around to it.  Until today.  I've researched copy cat recipes for the Marie Callender's pie of my youth and I decided to use them as a foundation, combined with my own current tastes and delicious memories.  I knew that I wanted to use fresh blueberries, as opposed to the canned filling combined with minced apples that most recipes call for.  Luckily for me, there was a one-day sale on organic blueberries at work this week.  Um, I bought 12 pints.  It was such a good deal, I couldn't resist.  And you can freeze blueberries you know!  Oh, I don't have to explain myself to anybody, so there!  Where was I?  Oh yes, the filling.  I wanted a fresh filling that would set and slice nicely without being overly rubbery.  And the topping needed to be creamy and rich, with that lovely tart taste of sour cream.  This was to be the kind of pie that is made in separate components and put together, not like other sour cream pie recipes that call for baking fresh fruit in a sour cream filling thickened with flour.

Back to the pie crust.  I used Cook's Illustrated Foolproof Pie Dough recipe.  It really does make a great crust and the addition of vodka keeps it nice and tender.  Just keep in mind when rolling your dough, if it is hot in your house you may need to put your dough back in the refrigerator, a lot.  And you might need to patch it up in areas where the heat of your fingers causes it to start melting.  But seriously, don't let me scare you.  You really should try this pie crust recipe, it's by far the best I've had.  Even if mine didn't look as pretty, the taste and texture was out of this world.

You can find the pie dough recipe here, but I included some photos of the steps.  I used the recipe for a double crust pie and froze the other half because I knew I'd be using it again.  I recommend you do the same because if you're committing the time to making a crust from scratch, you might as well make it worth your while.  The filling of this pie will really depend on your sweetness and juiciness of your berries.  You'll need to taste the filling as you go and add more sugar, lemon juice and thickener as needed.

This pie turned out to be even better than I remembered!  I bet you'll enjoy it just as much!

Elisa's Sour Cream Blueberry Pie
I used a 9" pie pan

FILLING
2 pints fresh blueberries
sugar to taste, I used one cup
fresh lemon juice to taste, I used one lemon
King Arthur Flour Instant ClearJel Powder, I used 5 Tb.
water as needed, I used 3/4 cup

TOPPING
4 oz. cream cheese
1 cup sour cream
1/2 cup powdered sugar
2 tsp. gelatin, bloomed in 2 Tb. cool water
1 tsp. vanilla extract

Put 1 1/2 cups of the flour, sugar, salt, butter and shortening into a food processor bowl.

Pulse a few times until it looks like this.  Then add the rest of the flour and pulse again.

When it looks like this, dump the mixture into a bowl.

Add 1/4 cup vodka, yes vodka, and 1/4 cup cold water to the crumb mixture.  You may want to take a shot of vodka for yourself at this point as well.  To calm your nerves.

Fold and press everything together until it looks like this.

Divide the pie dough into two even balls and flatten them out.  Wrap both in plastic wrap.  I put one straight into the freezer for later and the other I put into the refrigerator to rest and chill for 45 minutes.

Roll out the dough and put into a 9" pie pan and do what you like with the edges.  I fluted mine and then put the whole thing into the freezer for about 30 minutes.

When the crust is nice and firm, line it with foil and fill with beans (or pie weights) to "blind bake."  This keeps the crust from shrinking too much and bubbling up.  Bake at 375 degrees for about 25 to 30 minutes.  Carefully remove the foil and beans and bake an additional 10 to 12 minutes, until browned.  Set aside to cool completely.

Meanwhile, mix the sugar and Clearjel thickener together and add to a  saucepan with 1 pint of blueberries, water, sugar and lemon juice.   Cook over medium heat, stirring often, until nice and thick and jam-like, about 15 to 20 minutes.  Taste your filling and adjust the sugar and lemon juice as needed.

Add the remaining 1 pint of blueberries and only cook for about 5 minutes more.  This will give your filling a nice fresh flavor with plenty of juicy berries bursting in each bite.  Scrape into a bowl and set aside to cool.  It doesn't have to be cold, but don't put it into your crust piping hot.

For the topping, combine the cream cheese and powdered sugar in a mixer bowl and beat until well combined and smooth.

Scrape the bowl often and then beat in the sour cream and vanilla.  Mix until smooth.

Melt the bloomed gelatin in the microwave, be careful this only takes 15 to 20 seconds.  Then slowly pour it into the mixer while it is running on low speed.  Increase speed to medium high and mix until everything is combined.

Pour the sour cream topping over the cooled filling in the pie crust. Put in the refrigerator for a minimum of 4 hours.

You can decorate the top with blueberries if you like.  Wow, look at the "homey touches" on that pie crust!  Don't worry, even if it looks a little rough, I promise it will be delicious!!

Close up of the delicious pie filling!

Delicious flaky layers in the pie crust!  This is due to the use of cold butter, shortening and vodka!

Saturday, May 21, 2011

Rapture Pie!

Thank you to the wonderful people at Cook's Illustrated for creating this strawberry pie recipe, worthy of enjoying on what could potentially be your last day on Earth.  I had a feeling this pie would knock my socks off, which is why I chose not to bring it to work to share with my fellow team members even before I tasted it.  Sorry gang, I was going the greedy route with this one and I didn't even try to talk myself out of it.

I lost my recent issue of Cook's Illustrated in which I found this recipe.  You can't access recipes on their website unless you pay and join, but I found it posted on another website, so just click here for the complete recipe and steps.  If you don't already subscribe to Cook's Illustrated magazine, I HIGHLY recommend it.  Their test cooks make recipes over and over again until they find the best possible results.  I also enjoy their America's Test Kitchen show on PBS.  I'm  a huge fan.  In fact, I think Cook's Illustrated should hire me to be one of their test cooks.  What better addition to their staff than a cook with a culinary degree and a journalism degree?!  Ya hear that, Cook's Illustrated?

Anywho...this pie is the real deal.  Strawberries are in season right now and they are sweet and delicious!  You really need to make this pie, it's perfect for the end of the world or any other day of the week.


Cook down the frozen strawberries.

Cook until they are reduced to 2 cups.  Don't cheat and just use 2 cups,
you really need to be patient and let them cook down.

The reduced berries mixed with gelatin, lemon juice and sugar.
Cool to room temperature.

Fold in the sliced fresh berries.

Place the filling into your cooked and cooled pie crust.
Ignore my ugly crust.  I don't want to talk about it.

Cool the pie for at least 4 hours and decorate with lovely
swirls of whipped cream.

The most delicious strawberry pie you will ever eat!